-
 Laurent Heirendt authoredLaurent Heirendt authored
layout: page
permalink: /external/contribute/add-edit-card-vscode
shortcut: contribute:add-edit-card-vscode
redirect_from:
  - /cards/contribute:add-edit-card-vscode
  - /external/cards/contribute:add-edit-card-vscode
How to add or edit a howto card using Visual Studio Code
This shows how to use Visual Studio Code to write a howto-card:
Step 0: Update your local copy of your fork
Please update your fork first, by View > Command Palette and searching for 'Git: Fetch from all remotes'.
Step 1: Create a new Branch
For each how-to card, it is strongly recommended to create a new branch.
-
click on:
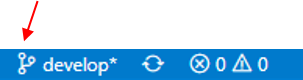 (on the bottom left)
 -
click on:
create new branch from...
-
add a name of the branch (e.g., name of the how-to card) and press Enter
-
choose
upstream/develop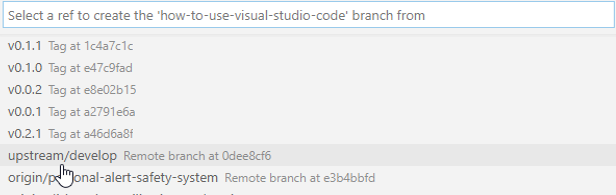
-
the new branch is created as can be seen on the bottom left of the screen

Step 2: Create a new folder
-
To create a new folder, browse to
howto-cards-internal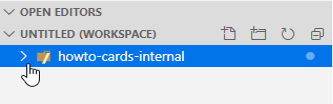
-
Then, select the
internalfolder:
-
Click on new folder (the name of the folder should be the name of the howto card). Please only use lowercase letters.

Step 3: Create a new file
-
Click on
New file. Name the file the same as the folder using lowercase letters linked by dashes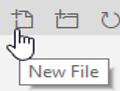
Step 4: Write the procedure in Markdown
If you need more details on how to do this, refer to the corresponding howto-card.
Step 5: Commit your changes
-
on the left side click on:

-
below changes click on:

stated changes
-
add a message (description of your changes) and click "commit"

Step 6: Push to git-r3lab
-
When you push your procedure for the first time click on the cloud icon:

-
Choose origin/"your gitlab user name"
-
Open git-r3lab: https://git-r3lab.uni.lu/

-
To synchronize changes:
